
Mean Girls Onesies


LEARN HOW TO MAKE CUSTOM ONESIES OR T-SHIRTS INSPIRED BY THE MOVIE MEAN GIRLS
A good friend of mine recently gave birth to a beautiful baby girl. She LOVES the movie Mean Girls so I knew I HAD to make her some custom Onesies for her little bundle of joy!
I designed three different styles from popular quotes in the movie. They are:
“It's October 3rd”

“On Wednesdays EVERY DAY we wear Pink!”

“My mom isn't like a regular Mom, she's a cool Mom!”

All three designs can be found in the free downloadable file.
In this tutorial, I’ll give you my step by step instructions and tell you what materials I think work best when making this project.
Basic and Premium TBH Crafters Club Members can download the SVG cut file for this project in the File Library.
Not a Member? Click here or the link at the bottom of the page to join!
This post contains some affiliate links (which means if you make a purchase after clicking a link, I will earn a small commission at no additional cost to you). Read my full disclosure policy here.
MEAN GIRLS ONESIES – MATERIALS LIST
- I am using the FABULOUS Cricut Maker. You could also use your Cricut Explore Air 2!
- Heat Transfer Vinyl. I am using Siser EasyWeed HTV and Glitter HTV.
- Cricut StandardGrip Cutting Mat (green)
- Blank Onesies or T-Shirts.
- Cricut EasyPress 2
- Cricut EasyPress Mat
- Cricut Weeding Tool

"Mean Girls" Onesies
Create adorable onesies, and shirts, inspired by the movie "Mean Girls". This tutorial will show to process for one of the designs but the same steps can be used for all three designs included in the downloadable file!
Materials
- My Mean Girls T-Shirt Cut Files
- Heat Transfer Vinyl in your choice of colors
- Blank Onesies or T-Shirts
Tools
- A way to cut out your vinyl. I am using my FABULOUS Cricut Maker! This project will also work for the Cricut Explore Air 2!
- Cricut StandardGrip Cutting Mat (green)
- Cricut EasyPress 2 (or any other heat press)
- Cricut EasyPress Mat
- Cricut Weeding Tool
Instructions
The downloadable file includes three designs. For this tutorial, I will be showing you how to make the "We Wear Pink" onesie. The instructions below will work for the other designs as well.
STEP 1 - DOWNLOAD THE SVG CUT FILE
Download the SVG Cut file for these Mean Girls T-Shirts (#30) from The File Vault. Get access by joining the club.
STEP 2 - UPLOAD THE SVG FILE TO CRICUT DESIGN SPACE
If you aren't familiar with uploading SVG files into Design Space, take a look at my quick and easy tutorial here. If you are on your smartphone, here is my tutorial on using the Cricut App.
STEP 3 - MEASURE YOUR ONESIE OR T-SHIRT BLANK
Before you do any prep work to the design in Design Space, you will want to know how large you want the image to be. Measure the blank area of your onesie, or t-shirt, taking note of the width and height.
STEP 4 - ADJUST THE DESIGN TO YOUR MEASUREMENTS
Once you have your image uploaded into Design Space, you will want to change the dimensions of the design.

With everything still grouped together, change the width and height using the SIZE bar.

STEP 5 - UNGROUP THE SVG FILE
Now that you have your design sized appropriately, you will want to hit the UNGROUP button to separate the layers.

STEP 6 - PREP YOUR LAYERS
We want the cutting machine to cut everything out as it appears in Design Space. In order to do this, we will need to attach the layers together.
Highlight the pink layers in the LAYERS panel.

Select ATTACH in the lower right hand corner.

Repeat this step for the black layers.


Click the GREEN Make It button.

STEP 7 - PREPARE YOUR MATS AND MAKE MATERIAL SELECTION
Before you make your material selections, you will want to MIRROR your layers.


Select CONTINUE.

Choose your material. I am using a combination of Siser EasyWeed HTV and Glitter HTV so I am choosing Heat Transfer Vinyl (Non-Cricut).

Click DONE.

STEP 8 - LOADING YOUR MATS AND MAKING THE IMAGE
When placing the HTV to your cutting mat, you will notice a shinier side of the vinyl. This is known as the carrier sheet which you will be pressing your EasyPress 2 against. Make sure this side is facing DOWN. The side you will be cutting is, usually, slightly dull looking. This side needs to be facing UP.
Once you have placed your vinyl onto your mat, load the cutting mat into the machine by pressing the flashing ARROW button.

You will know the machine is ready to cut your material when you see the flashing "C" button. Press that to start the cut.

Once your Cricut is finished cutting the layer, the ARROW button will flash again. Press it to UNLOAD the mat.
Carefully remove the vinyl from the mat.
Repeat this step until all layers have been cut.
STEP 9 - WEED YOUR VINYL
I will say that most of the time, I do weed on the mat. This is helpful because the cutting mat can act as a third hand to keep the vinyl from curling when you are trying to weed.
You will want to only remove the vinyl NOT the carrier sheet as this will protect your vinyl once its time to press it!
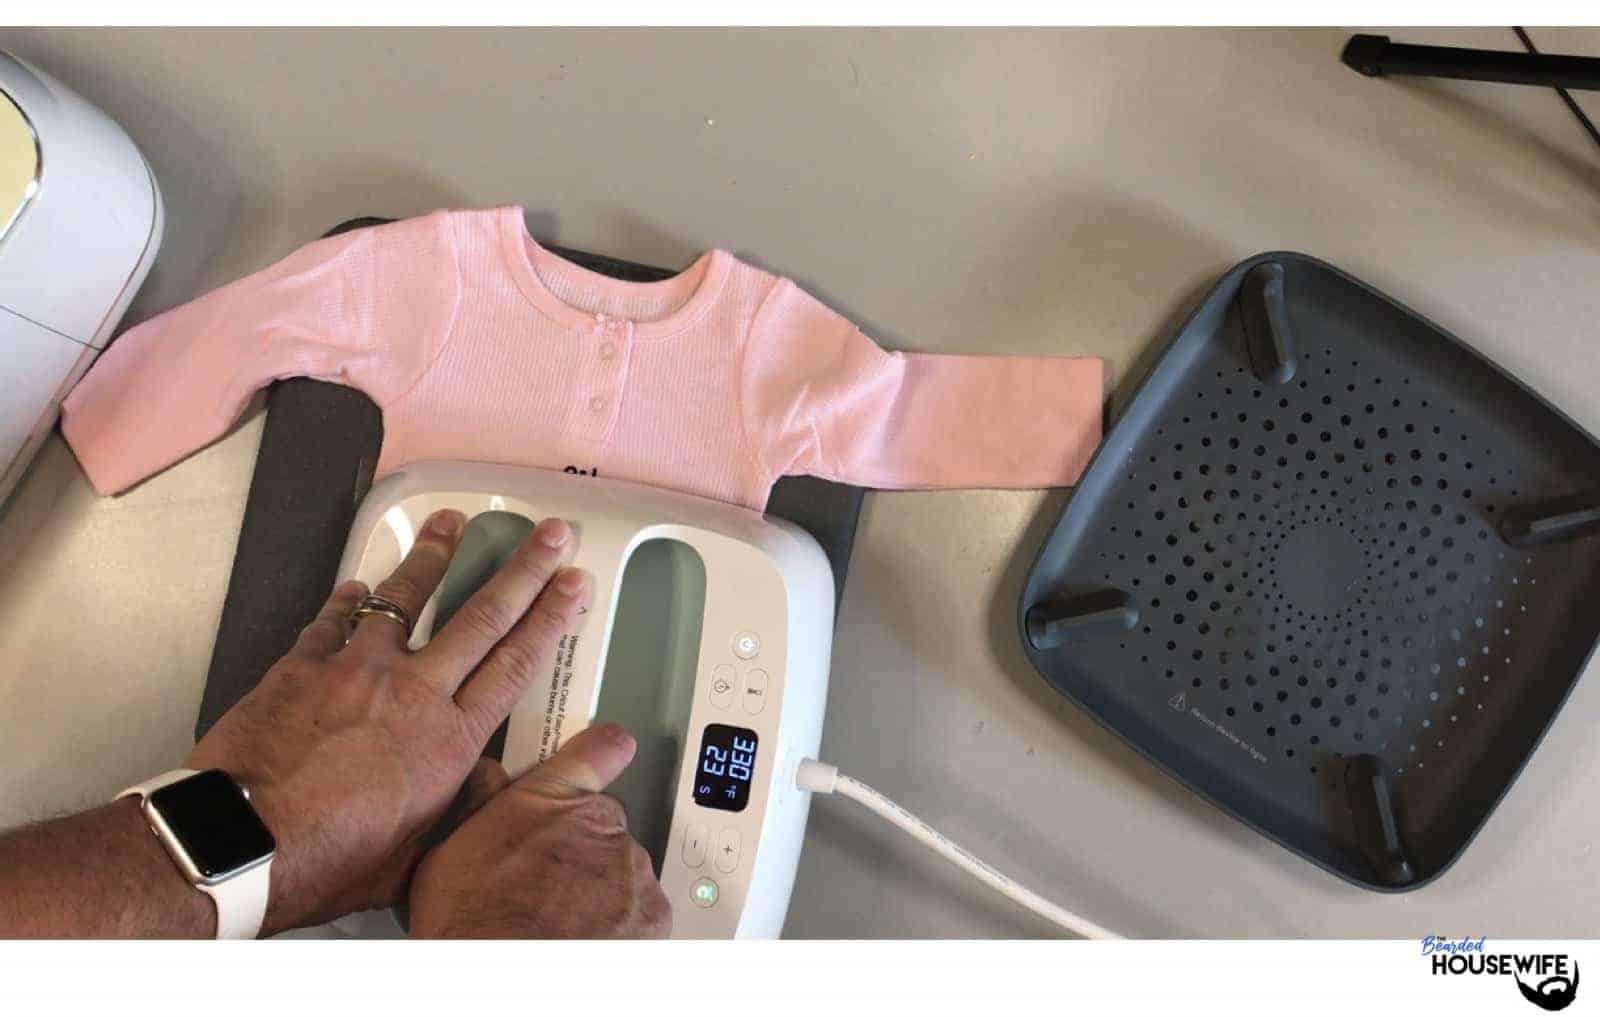
STEP 10 - PREHEAT YOUR EASYPRESS 2
According to the Cricut EasyPress Heat Guide, found here, the temperature should be set to 315 degrees Fahrenheit. Set that temperature by pressing the temperature icon. Once the temperature starts to flash, you can increase it using the arrows.

STEP 11 - PREPARE YOUR ONESIE OR T-SHIRT BLANK
While your EasyPress is coming up to temp, prep your shirt blank. I like to first fold the shirt in half.

Then lightly press the onesie using the EasyPress. This will help me line up the image to ensure I have it straight.

STEP 12 - PRESS YOUR ONESIE OR T-SHIRT
Before applying your image, you have to heat your onesie. The Cricut Heat Guide from above states you should heat the shirt blank for 5 seconds.

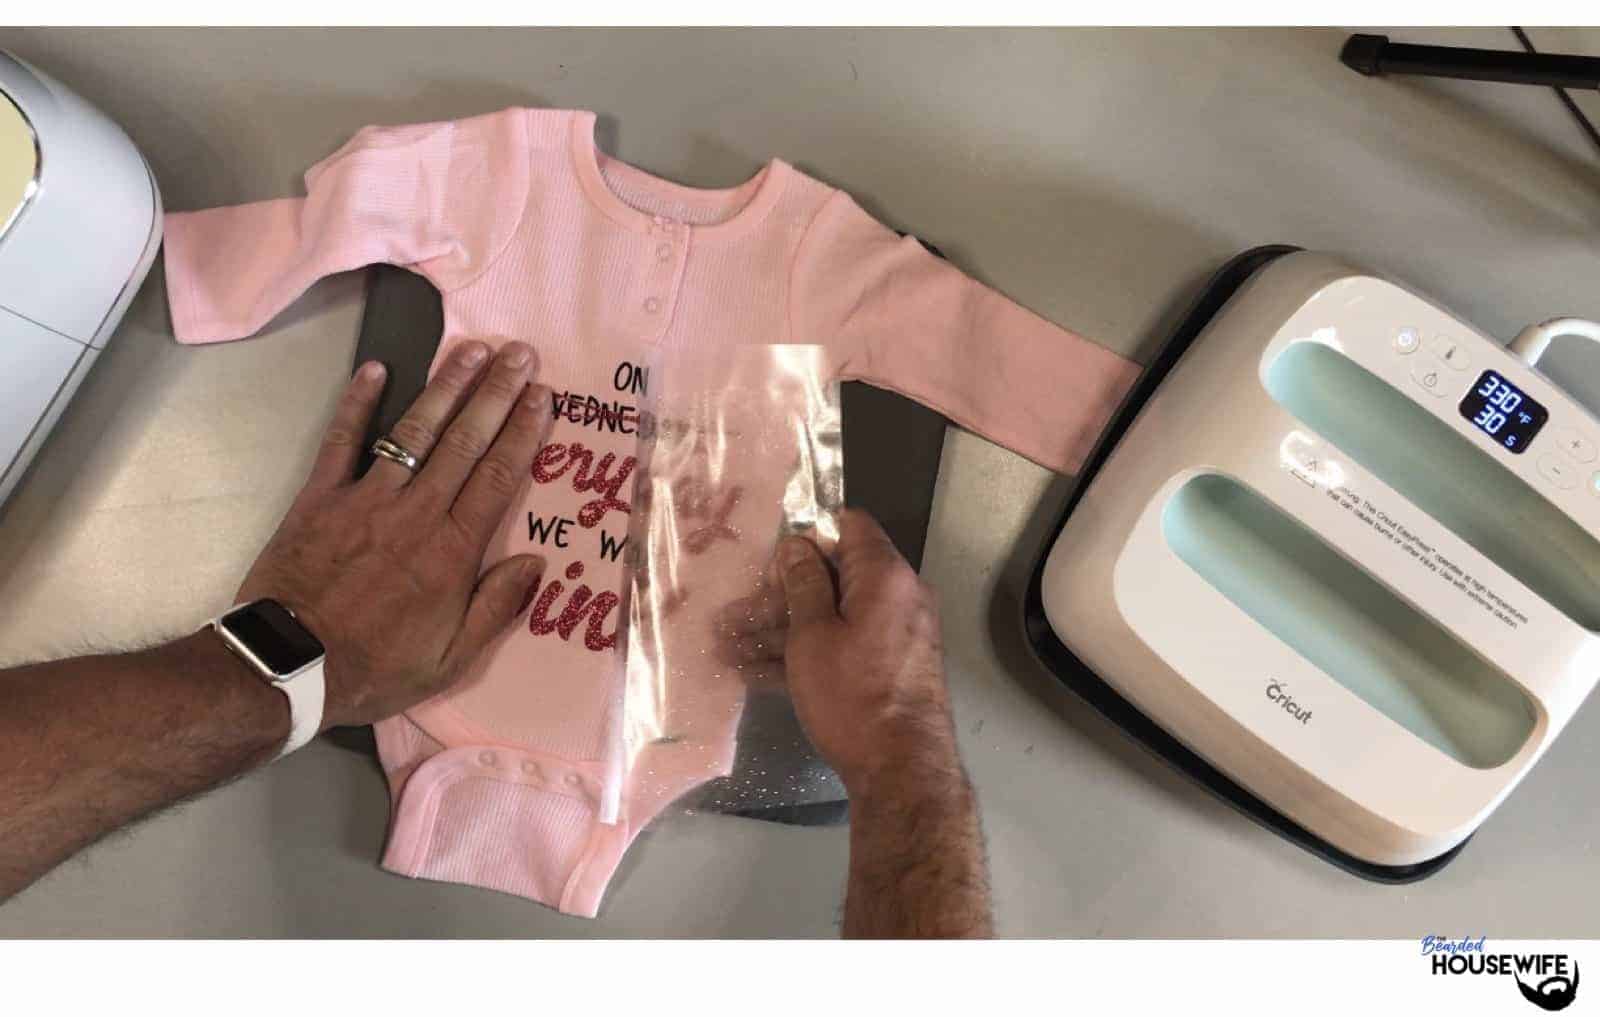
STEP 13 - APPLY IMAGE TO ONESIE
Place your design onto your onesie with the carrier sheet facing UP. Make sure to line up the center of your design with the line you creased down the center of the shirt blank.

STEP 14 - PRESS LAYER
According to the Cricut Heat Guide, you should press your layer for 30 seconds.

STEP 15 - REMOVE CARRIER SHEET
Slowly lift press off your design making sure to lift straight up.
The Heat Guide says to remove the carrier sheet with a cool peel. This means to wait until the shirt is cool to the touch. Remove the carrier sheet by carefully pulling from one corner. Pay attention to any lifting of the vinyl. If this happens, replace the carrier sheet and press for a few more seconds.
STEP 16 - REPEAT FOR REMAINING LAYER
Add your remaining layer folliowing steps 13 and 14. Do not remove the carrier sheet yet!

STEP 17 - FLIP YOUR SHIRT OVER AND PRESS
Once you have pressed your final layer, flip the shirt over immediately, leaving the carrier sheet in place.

You will want to press the back for 15 seconds which is stated in the Cricut Heat Guide.

Flip your shirt over and remove the carrier sheet once it is cool to the touch.
Your custom onesie, or t-shirt, is now complete!

I just KNOW anyone who is a fan of the movie will love these onesies or t-shirts!
If you plan on giving these as gifts for a new mom or dad, include one of my New Baby Pop-Up Cards too!
Post a photo in the comment section or tag your projects on social media @thebeardedhousewife using the hashtag #beardedhousewife! I'd love to see how they turn out for you!
Love,
WANT TO MAKE GREETING CARDS AND PAPERCRAFTS ON YOUR CRICUT?
JOIN THE BEARDED HOUSEWIFE CRAFTERS CLUB TO GAIN ACCESS TO HUNDREDS OF SVG CUT FILES, PROJECTS, AND OUR EXCLUSIVE COMMUNITY!
WANT TO REMEMBER THIS POST FOR LATER? PIN THIS POST TO YOUR FAVORITE PINTEREST BOARD!
Responses