
Foil Mandalas with the Cricut Foil Transfer Kit
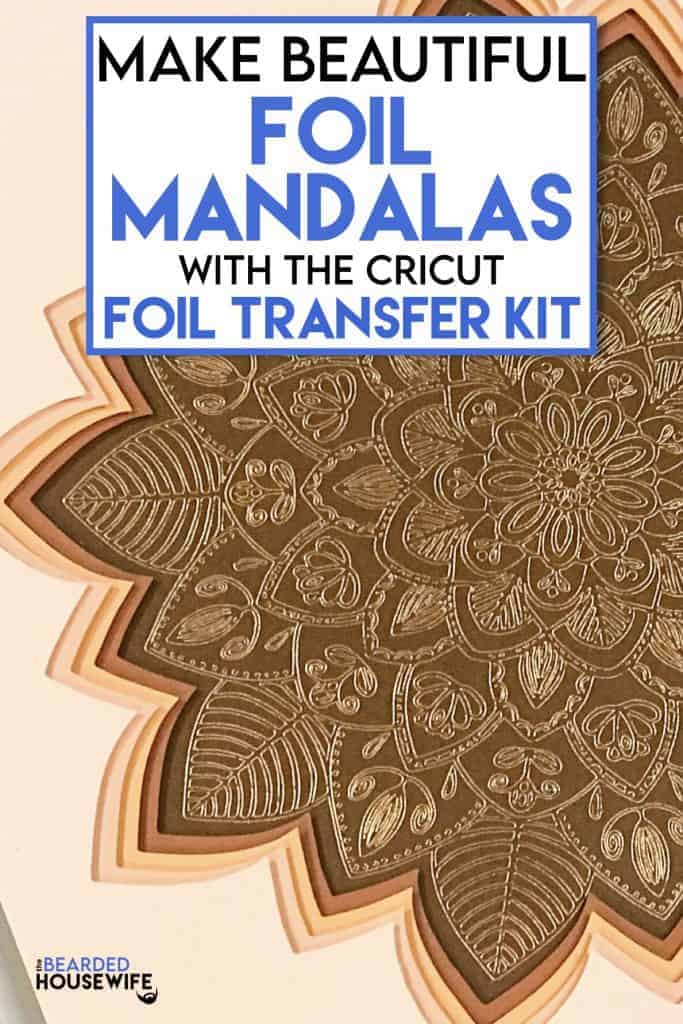
LEARN HOW TO CREATE BEAUTIFUL FOIL MANDALAS USING CRICUT'S NEWEST TOOL – THE FOIL TRANSFER KIT
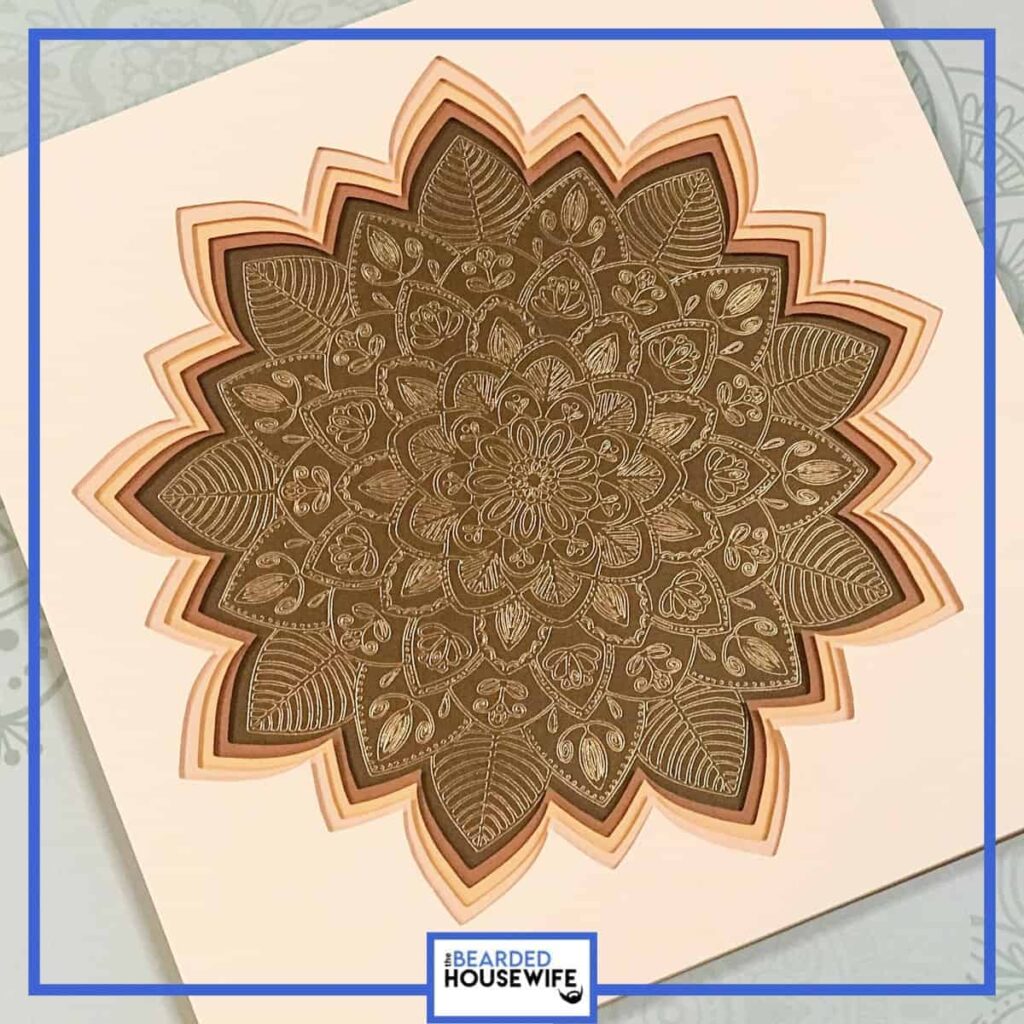
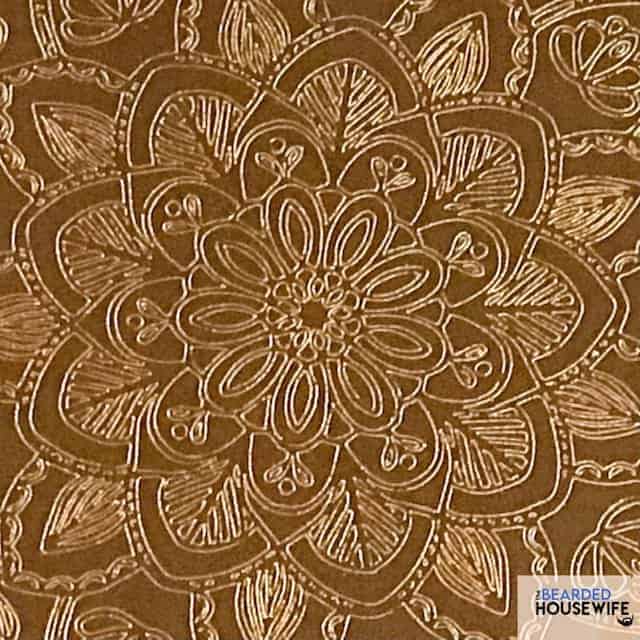
If you are a crafter, you probably have heard that Cricut released a new tool called the Foil Transfer Kit. It creates a pressed foil onto cardstock by using pressure instead of heat. It is, in one word, AMAZING! As soon as I heard about it, I knew I wanted to make foil mandalas!
So, I got to designing. This mandala took my five days to finish drawing but the result is SO SO worth it!
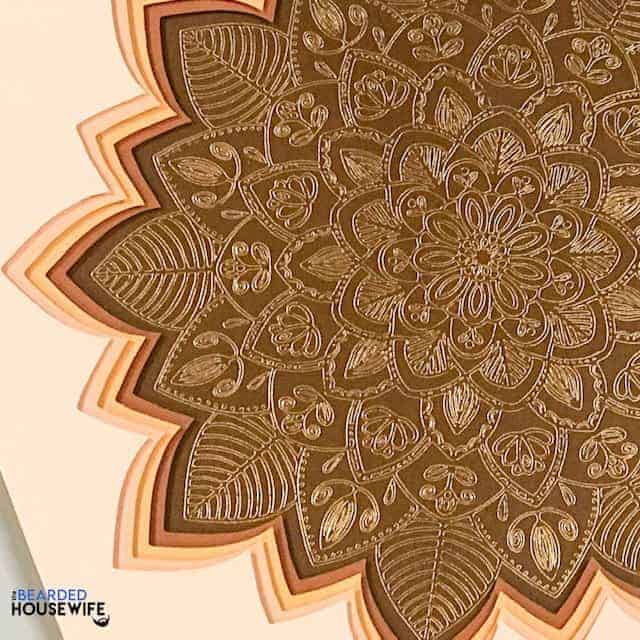
The detail this new tool can replicate is just incredible. I love the shine and texture it adds to the cardstock. So beautiful!
Now, I need to mention a few things about the Foil Transfer Tool. It can only be used with Desktop or Laptop. Like the Knife Blade, it is not compatible with Design Space mobile apps on your smartphone or tablet. Also, it cannot be used with a Cricut Joy machine.
In this tutorial, I’ll give you my step by step instructions and tell you what materials I think work best when making this project.
Basic and Premium TBH Crafters Club Members can download the SVG cut file for this project in the File Library.
Not a Member? Click here or the link at the bottom of the page to join!
This post contains some affiliate links (which means if you make a purchase after clicking a link, I will earn a small commission at no additional cost to you).Read my full disclosure policy here.
FOIL MANDALAS – MATERIALS LIST
- I am using the FABULOUS Cricut Maker. The Foil Transfer Kit also works with your Cricut Explore Air 2!
- Cricut Foil Transfer Kit
- Cricut StandardGrip Cutting Mat (green)
- Cricut Cardstock in your choice of colors
- Cricut Foil Transfer Sheets (available in silver and gold)
- Foam squares (optional)
- Shadow box frame
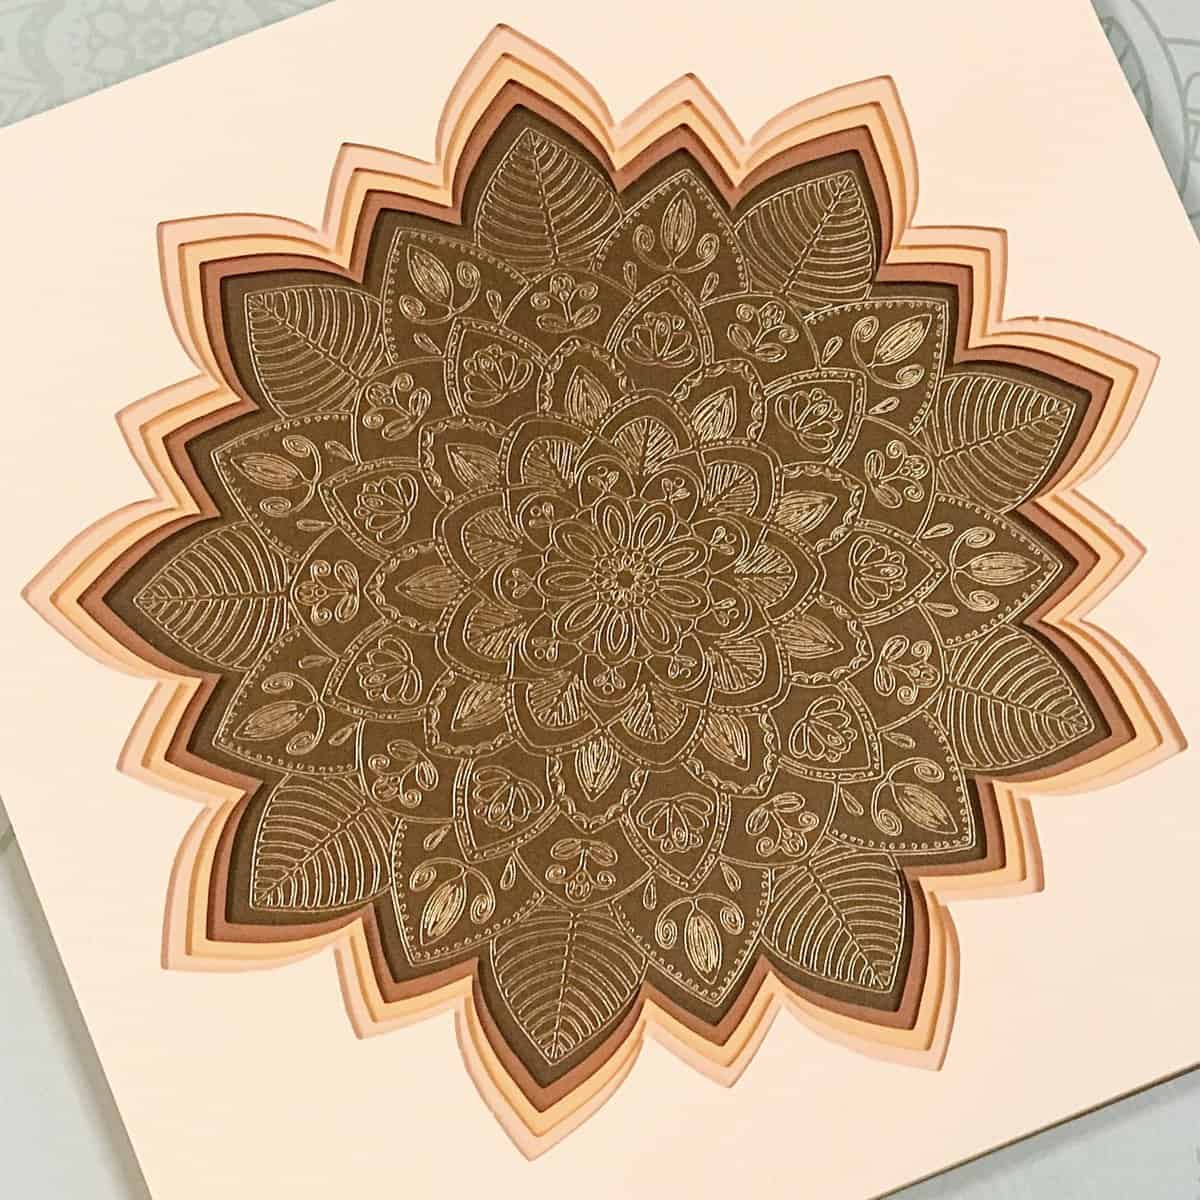
Beautiful Foil Mandalas
Create absolutely gorgeous foil mandalas with layered cardstock and the Cricut Foil Transfer Kit!
Materials
- My Foil Mandala SVG Cut File
- Cricut Foil Transfer Sheets. I am using the gold.
- Cricut Cardstock in your choice of colors
- Shadow Box Frame
- Painter's Tape (optional)
- Foam squares (optional)
Tools
- A way to cut out your cardstock and do your foiling. I am using my FABULOUS Cricut Maker.
- Cricut Foil Transfer Tool with tips
- Cricut StandardGrip Cutting Mat (green)
- Cricut Brayer
Instructions
STEP 1 - DOWNLOAD THE SVG CUT FILE
Download the SVG Cut file for the Foil Mandala (#41) from The File Vault. Get access by joining the club.
STEP 2 - UPLOAD THE SVG FILE TO CRICUT DESIGN SPACE
If you aren't familiar with uploading SVG files into Design Space, take a look at my quick and easy tutorial here. If you are on your smartphone, here is my tutorial on using the Cricut App.
STEP 3 - UNGROUP THE DESIGN
Once uploaded into Cricut Design Space, ungroup the design by selecting UNGROUP in the layers panel.

Note: My image is 10.5 inches squared which fits in my shadow box I am using. If your frame or shadow box is different, make the adjustment to the size of your design BEFORE ungrouping!
STEP 4 - CHANGE CUT LINES TO FOIL LINES
Scroll down to the mandala design. Select it.

Under the LINETYPE menu, select FOIL.

Select FINE for the tip.

Highlight the group the mandala is under.

Click ATTACH in the lower right side of the layers panel.
Click the GREEN Make It Button.
STEP 5 - MAKE YOUR MATERIAL SELECTIONS, LOAD THE FOIL TRANSFER TOOL, AND PREP YOUR MAT
For this project, I am using Cricut Medium Cardstock.
To load your fine tip into the foil tool, press down on the plunger.

Insert the fine tip into the tool and release the plunger.

Now, adhere your cardstock to your mat.

Add a piece of foil on top of the cardstock.
Note: Do make sure you have only one piece of foil. They do tend to stick together!

Take a piece of tape that is included with your foil.

Adhere the foil to the mat by adding tape along all four sides. You will want the foil to be slightly tought. Not too tight that it will rip but not too loose either!

If you need to add more tape, you can use painters tape to help adhere an area of the foil.

STEP 6 - LOADING YOUR MATS AND FOILING/CUTTING THE IMAGE
Once you have placed your foil ready to go, load the cutting mat into the machine by pressing the flashing ARROW button.

Load the Cricut Foil Transfer Tool into CLAMP B.

You will know the machine is ready to start the foiling process when you see the flashing "C" button. Press that to start.

Once the foiling has completed, carefully remove the tape and foil from your cardstock. DO NOT PRESS THE ARROW BUTTON THAT UNLOADS THE MAT!

Return the Fine Point Cutting Blade to CLAMP B.

Press the flashing "C" to complete the cut.

After your machine has finished, continue cutting the remaining layers.
STEP 7 - LAYERING YOUR MANDALA INTO YOUR FRAME
Your mandala is now complete.


Here are two versions. One with the foam squares to add extra dimension and one without.

You can run the foam squares along the perimeter of the layers to add that dimension. Totally up to you. They are beautiful either way!

Before you add your mandala to your frame, insert the included push pins into the fabric backing.

Layer your mandala into the shadow box from lightest to darkest.

Add the backing to your frame and secure it.

Your gorgeous art is now ready to display!

Do you love it? I hope so! Post a photo in the comment section or tag your projects on social media @thebeardedhousewife using the hashtag #beardedhousewife! I’d love to see how yours turn out!!
I am so excited to create more and more projects that incorporate foil! It really elevates your work!
Love,

WANT TO MAKE GREETING CARDS AND PAPERCRAFTS ON YOUR CRICUT?
JOIN THE BEARDED HOUSEWIFE CRAFTERS CLUB TO GAIN ACCESS TO HUNDREDS OF SVG CUT FILES, PROJECTS, AND OUR EXCLUSIVE COMMUNITY!
WANT TO REMEMBER THIS POST FOR LATER? PIN THIS POST TO YOUR FAVORITE PINTEREST BOARD!
Thank you
You are most welcome! It’s my pleasure! Enjoy it! Let me know how it turns out!! 😊
Just got my foil kit! This is a beautiful project! Thank you.
Shirl,
Hi there! You are most welcome! Thank you for the compliment! Enjoy your foil kit. It is addicting!! Let me know how your mandala turns out!
Gorgeous! This will be my next project 😊
Thank you for this beautiful file and the excellent how-to video! I just got my Cricut Foil Tool Kit and a pack of gold foil. You have given me the confidence to open it and make your mandala. I am grateful and really excited! 😊
Ida,
That is so sweet. Thank you. It is a fun project. Let me know how it turns out! Congrats on getting the transfer kit. It can be addicting!! ❤️
This is beautiful! Can you please tell me if you used this new foil tool on anything not specifically listed in the “materials” Cricut recommends? That is things like, acrylic (I know not likely to work), foam, fabric, wood, etc.?
Thank you, Janelle!
I haven’t done much experimenting with different materials yet.
I don’t think acrylic would work but wood should!
I never cared to make a mandala design until I saw yours. I love it!!! Thank you for sharing your beautiful design!
Jania,
Thank you so much. I’m glad you enjoy it!
Sharing is what I love to do and is a pleasure!
Let me know when you finish yours. I’d love to see it!
-Nick
I hope I did this right was the foil Mandela supposed to cut out like the others? Mine didn’t it’s beautiful. I will work on layers but love the design.
Hi, Karen!
The foil layer is not supposed to cut out like the others. Your machine should have foiled the mandala and then cut the piece of cardstock down to 10.5×10.5.
Did it do that? Thank you for the compliment! I’m glad you like this project. It is a favorite of mine!