
How to Make Christmas Box Cards


LEARN TO MAKE PRETTY CHURCH BOX CARDS FOR CHRISTMAS USING YOUR CRICUT CUTTING MACHINE
I admit, we do not go to church like we should. It is very rare that we go. Whether it be a baptism, wedding, or funeral, I always leave the service telling my husband that we need to start going regularly.
I remember Christmas Eve midnight mass. The church was so beautifully decorated and it seemed like the unity of the church-goers was almost palpable.
I created this box card in honor of those memories. It not only is super easy to assemble, it is beautiful on your table. Add a sentiment to the back, fold it flat, and mail it in the included envelope.
In this tutorial, I’ll give you my step by step instructions and tell you what materials I think work best when making this project.
Basic and Premium TBH Crafters Club Members can download the SVG cut file for this project in the File Library.
Not a Member? Click here or the link at the bottom of the page to join!
This post contains some affiliate links (which means if you make a purchase after clicking a link, I will earn a small commission at no additional cost to you). Read my full disclosure policy here.
CHRISTMAS CHURCH BOX CARD – MATERIALS LIST
- I am using my Cricut Maker. You could also use your Cricut Explore Air 2, Cricut Explore 3, or Cricut Maker 3!
- Cricut LightGrip Cutting Mat (blue) or Cricut StandardGrip Cutting Mat (green)
- Cricut Scoring Wheel or Scoring Stylus
- Cardstock in your choice of colors. I am using my white cardstock for the card base, green and red for the wreath, and blue for the envelope inlay.
- Glue or Adhesive
- Cricut Brayer
- Cricut Scraper
- Cricut Tweezers

Christmas Church Box Card
This tutorial will show you how to make a pretty church box card for Christmas.
Materials
- My Christmas Church Box Card SVG Cut File
- Cardstock
- Glue or adhesive
Tools
- A way to cut out your cardstock. I am using my FABULOUS Cricut Maker!
- Cricut LightGrip Cutting Mat (blue) or StandardGrip Cutting Mat (green)
- Cricut Scoring Wheel or Stylus
- Cricut Brayer
- Cricut Scraper
- Cricut Tweezers (optional but so helpful!)
Instructions
STEP 1 - DOWNLOAD THE SVG CUT FILE
Download the SVG Cut file for the Christmas Church Box Card (#100) from The File Vault. Get access by joining the club.
STEP 2 - UPLOAD THE SVG FILE TO CRICUT DESIGN SPACE
If you aren't familiar with uploading SVG files into Design Space, take a look at my quick and easy tutorial here. Using your smartphone? Click here for my step-by-step guide on uploading SVG files with the Cricut App.
STEP 3 - UNGROUP CARD LAYERS
The file will upload into Cricut Design Space grouped together. You will want to hit the UNGROUP button to separate the layers.

STEP 4 - CONVERT FOLD LINES TO SCORE LINES
Scroll down the list in the LAYERS panel and find the envelope. Click the fold line.

Change the fold lines to score lines by changing the OPERATION from BASIC CUT to SCORE.

Attach the score line and the envelope by highlighting the GROUP and selecting the ATTACH option in lower right hand corner.

Repeat this step for all layers with score lines.
Click the GREEN Make It Button.

STEP 5 - MAKE YOUR MATERIAL SELECTIONS AND PREPARE YOUR MATS
You will see the six mats for this card in the mat preview.
Click the CONTINUE button.

For this tutorial, I am using Medium Cardstock. Select your materials accordingly.
Attach your cardstock to the Cricut StandardGrip Mat using the Cricut Brayer.
STEP 6 - LOADING YOUR MATS AND CUTTING YOUR MATERIALS
To load the mat into the machine, press the double arrows button. Do make sure that the mat is positioned under the mat guides.

You will know the machine is ready to cut your material when you see the flashing "C" button. Press that to start the cut.

Follow Design Space prompts to change out the scoring wheel and fine point cutting blade.
Once the cut is complete, make sure to peel the mat away from the cardstock
rather than the cardstock from the mat. This will prevent any curling of your design.
Repeat Step 6 for until all layers have been cut.
STEP 7 - ASSEMBLE YOUR CARD
Now that everything is cut, we can start to assemble the card.

Begin by folding the church base along the score lines.
Burnish the fold with your scraper.

Apply glue to the tab on the church base and adhere it to the apposing wall, forming the box.


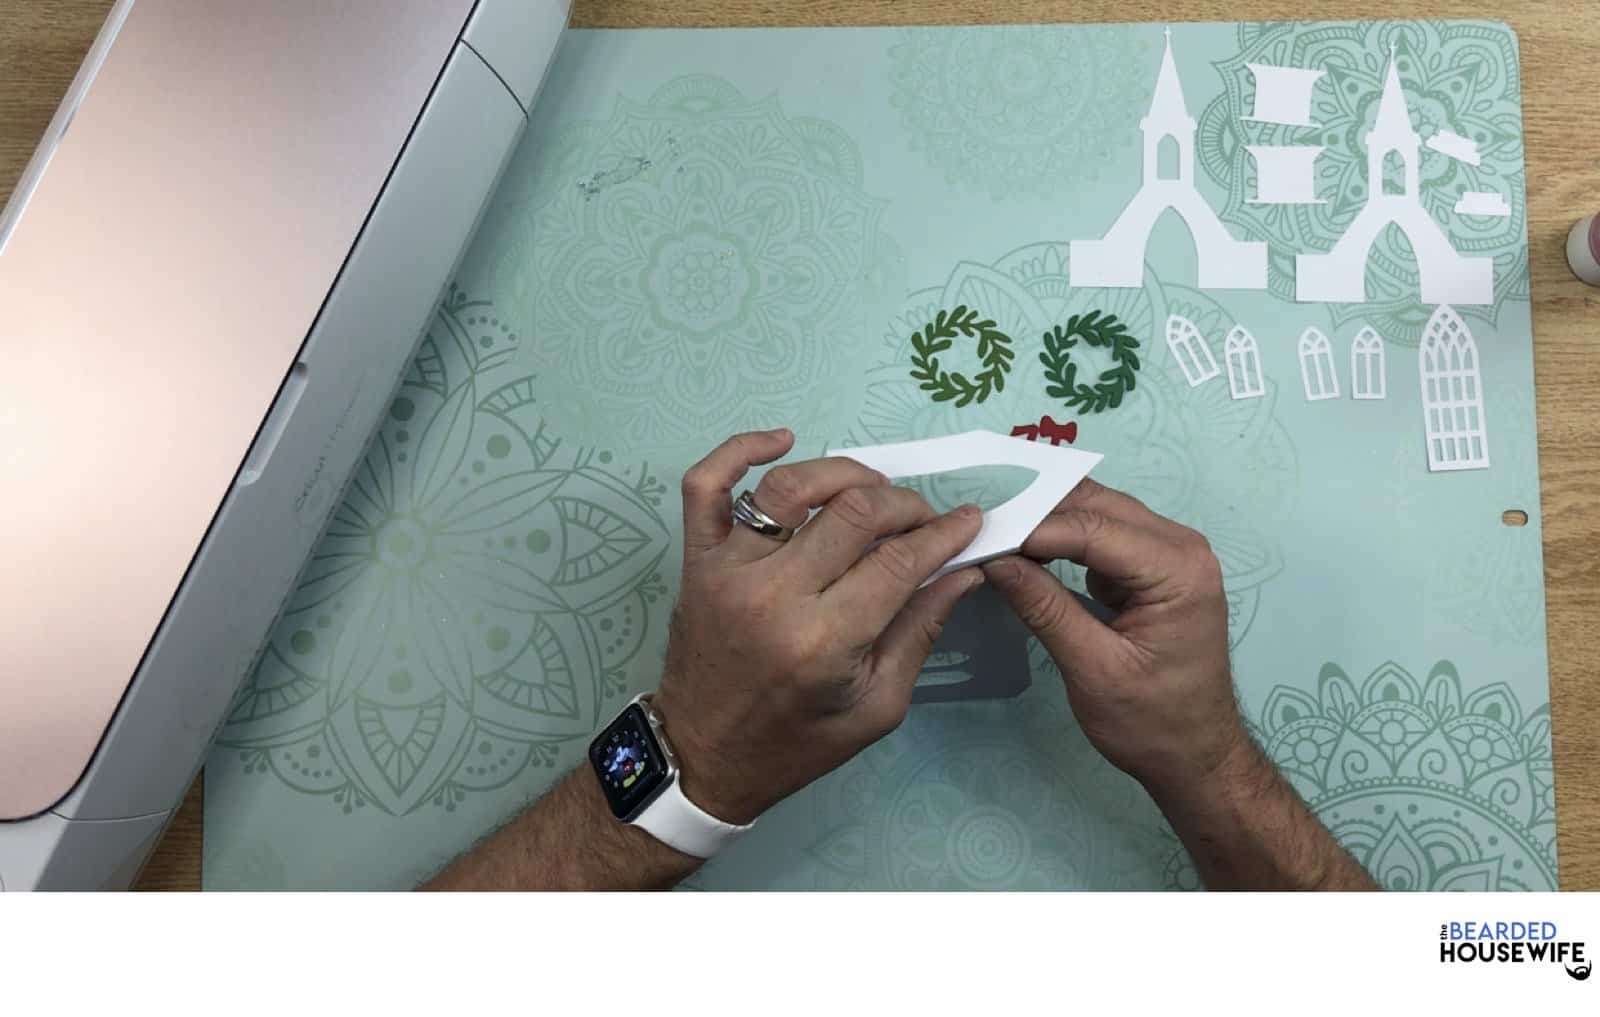
Add glue around the cutouts for the windows.

Apply the window trim over the cutouts.
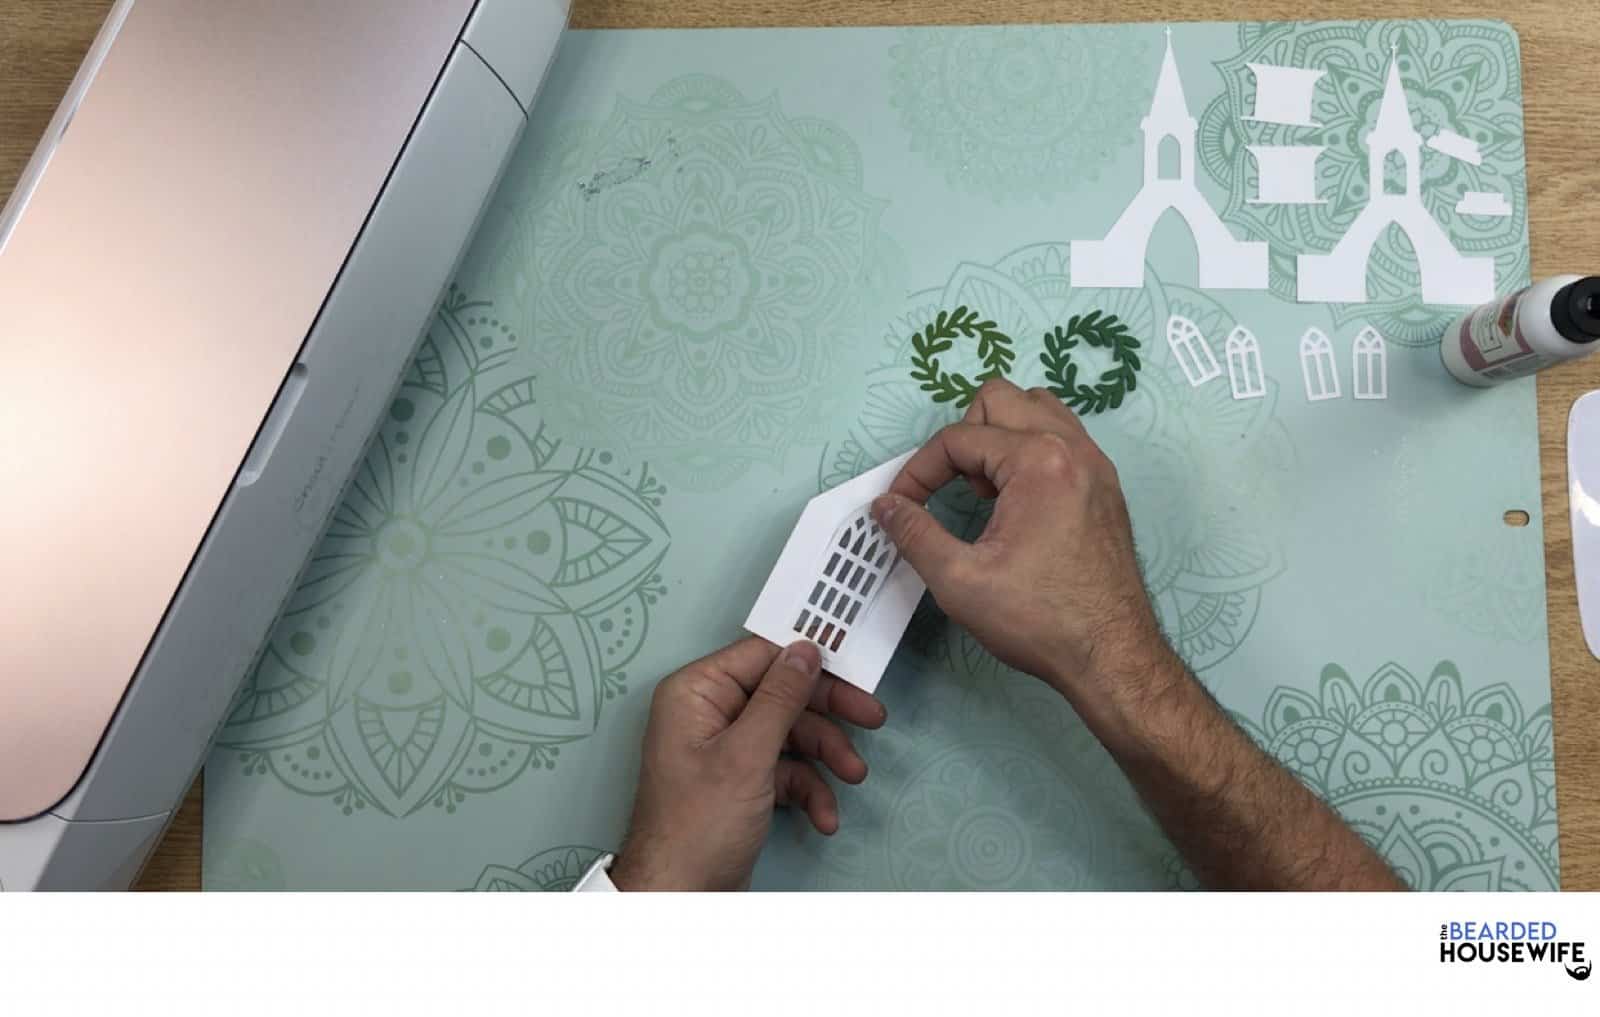
Repeat for all windows.

Add glue to the inside of one of the wreath pieces.

Layer the second wreath piece on top.

To form the bow, start by holding it with one hand.

Wrap the tail around the back, up, and around to the front again.


Place a dab of glue on the underside of the tail and adhere into place.


Adhere the ribbon tails to the bow by placing glue on the backside and pressing the tails into place.


Add the bow to the wreath.

Now, glue the wreath to the largest church window.

Find the two accent pieces for the steeples. Fold them along the score lines.
Add glue to the tab (not the curved side) and place on the steeple.


Repeat for the second steeple.

Fold the connecting tabs along the score lines.

Add glue to one of the tabs and adhere behind one of the steeples. Make sure to line up the edge of the tab with the edge of the window cutout on the steeple.


Repeat for the second connecting tab.

Now, add glue to the tabs on the other side.

Place the second steeple onto the tabs making sure to line everything up as you did before.


Fold the tabs of the steeple facing away from each other.

Add glue to the tabs and adhere to the inside of the church base. Make sure to line up the top edge of the tabs with the top edge of the base.


Fold the card to make sure everything lays flat.

STEP 8 - FORM THE ENVELOPE
To make the envelope, begin by folding along the score lines and press the folds with your scraper.


Add glue to the outer edge of the inlay as well as around the cutout.

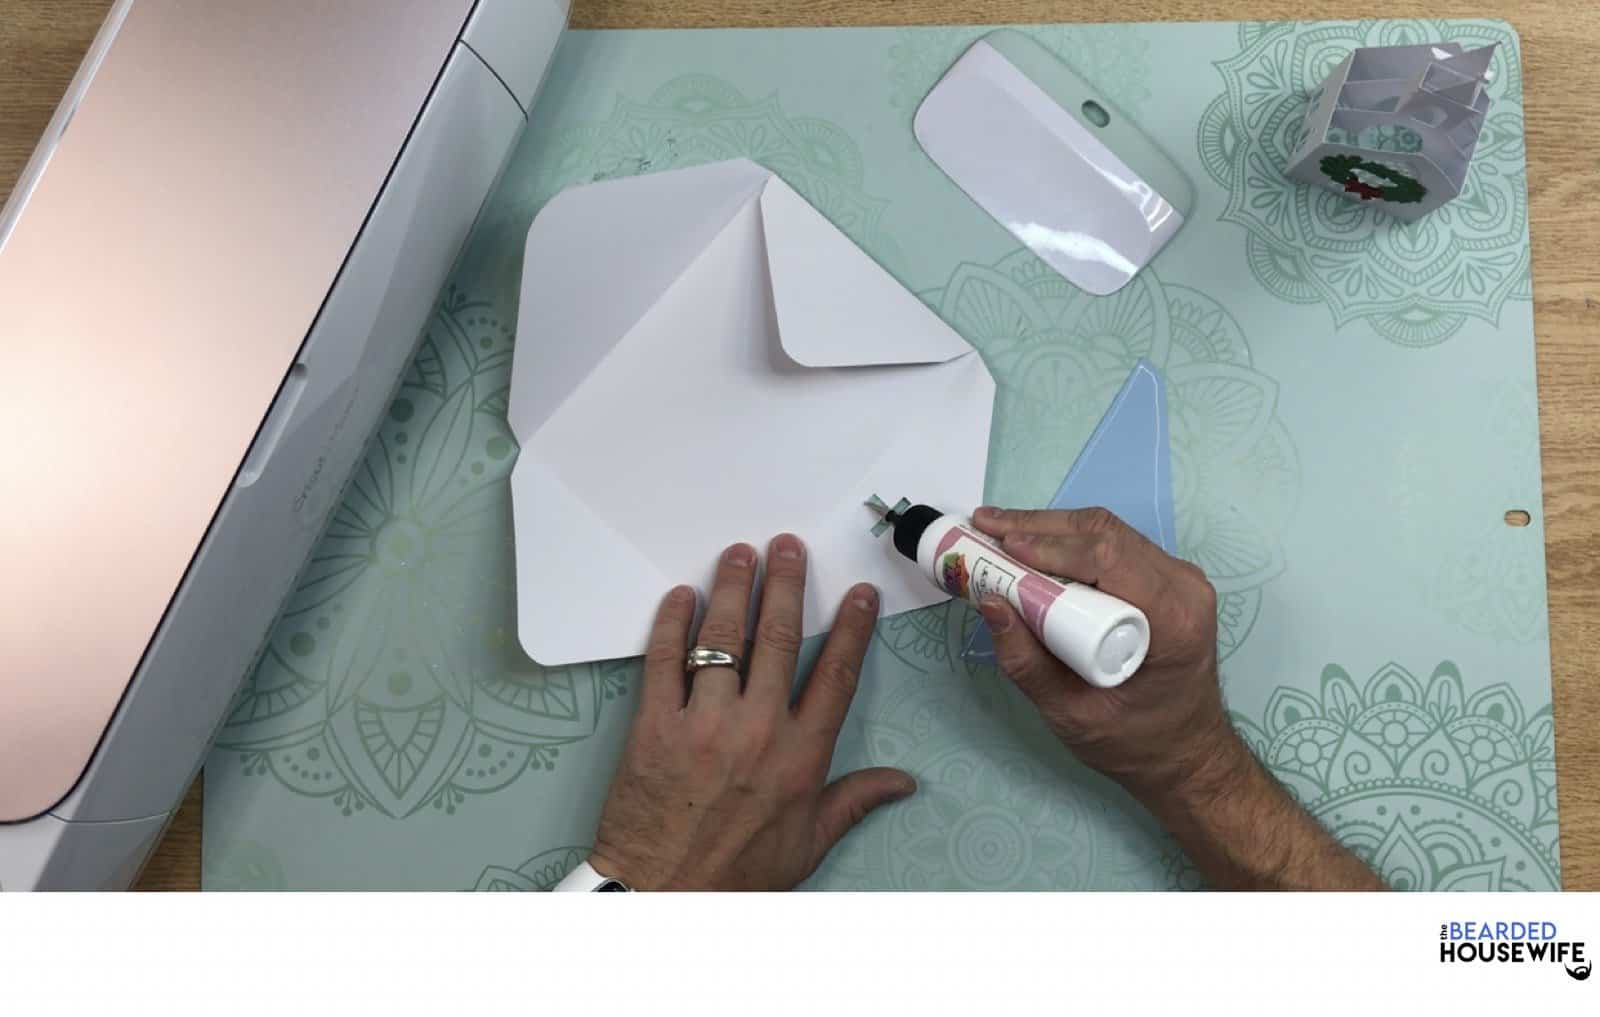
Apply the inlay to the envelope.

Add glue along the bottom of the side flaps.

Bring the bottom flap up and press into place forming the envelope.


Your card is ready!

I know this card will put a smile on anyone's face – religious or not!
Post a photo in the comment section or tag your projects on social media @thebeardedhousewife using the hashtag #beardedhousewife! I’d love to see how yours turn out!!
WANT MORE FREE HOLIDAY CUT FILES?
Thirteen of my crafting buddies and I got together for the Holiday Showcase. Take a look at these amazing Holiday crafts!

- Gift Labels from Jen Swift of WellCraftedStudio.com
- Christmas Village for Advent from Lucy of PaperGlitterGlue.com
- Wood Door Hanger from Laurie of CraftRoomTime.com
- Hand Lettered Holiday Cards from Maira of VialDesigns.com
- Flocked HTV Christmas Pillows from Natalie of Nelidesign.com
- Paper Poinsettia from Abbi of AbbiKirstenCollections.com
- Holly Wreath from Gjoa of SpecialHeartStudio.com
- Holiday Explosion Card from Jennifer of MyScrapMenagerie.com
- Handmade Christmas Card from Sarah of CraftwithSarah.com
- Christmas Explosion Box from Emily of MinorDIY.com
- Paper Craft Spinning Ornaments from Bette of BettesMakes.com
- Scrapbooking Christmas Cards from Molly of MollyCreates.com
- Hanukkah Earrings from Amy of AmyRomeu.com
Happy Holidays!

WANT TO MAKE GREETING CARDS AND PAPERCRAFTS ON YOUR CRICUT?
JOIN THE BEARDED HOUSEWIFE CRAFTERS CLUB TO GAIN ACCESS TO HUNDREDS OF SVG CUT FILES, PROJECTS, AND OUR EXCLUSIVE COMMUNITY!
WANT TO REMEMBER THIS POST FOR LATER? PIN THIS POST TO YOUR FAVORITE PINTEREST BOARD!
Oh wow. This is absolutely stunning. Thank you so very much.
My pleasure, Kimberly!!
Thank you so much for doing the 12 days. Your designs are lovely and easy to put together 🙂
Thank you. I’m so glad you like the projects, GG!
Beautiful!!! I am going to make this for my mom. My dad built a church for our front lawn when I was growing up. It had lights in it and it played Christmas music for all to hear. People in our home town still talk about it. Sadly my dad has passed but this card will put a huge smile on my moms face. Thanks again for a beautiful creation Nick.
I am sorry for your loss. I hope this card helps to brighten you and your mom’s holiday.
😊
I love this little church.
Thank you, Yvonne!
My mom is facing the reality of leaving her home and church community of 38 years. This will be my gift to her this Christmas. Looking forward to making it and sending it to her.
I am so sorry to hear that. I hope this card brightens her spirits!
So beautiful! Simple to put together and a unique Christmas card to give to someone special!
Thank you, Pat!
Oh my goodness, this box card is gorgeous! And I thought I was in love with day 2, then comes day 3 and I’m even more in love with this project! Thanks for the file Nick, I can’t wait to make this one too and send it out this Christmas. Hugs, Brenda
Thank you!!
Thank you for the beautiful card! When I upload the file into DesignSpace it re-sizes it and says it is too big to cut. Because we don’t know the dimensions of each piece, I can’t re-size the file so the components work. Is there a way to upload the file as is and NOT have DesignSpace re-size it?
Hi Anna. Can you send me a screenshot? I’m not sure what you mean by “it re-sizes it”. I’ve uploaded on Desktop and Mobile with no issues.
Please send a screenshot to
hello@thebeardedhousewife.com
The problem should be resolved. Please download the file again. Thanks for pointing this out!
I am having the same issue as Anna, it’s because of the size of the envelope. I am using an Explore air2. The max dimensions are 11.5″ x 23.5″ or less on my machine.
I see the issue now. The envelope isn’t oriented the way it should be. I’m at a doctor’s appointment for my daughter right now. I will fix that when I get home.
The problem should be resolved. Please download the file again. Thanks for pointing this out!
HUGE thanks! I just discovered your blog and I am so happy I did! So much to discover.
Thank you, Anna!
Thank you so much! I pray you find a church and a church family! It’s the best thing next to sliced bread. Merry Christmas!